About us
▼
Recipes - Pages
▼
Pages
▼
Monday, September 30, 2013
31 Days To Better Health
Everyone wants to eat healthier, exercise, be stress free, think positive thoughts and feel healthy and balanced. BUT with our busy lifestyles, this can be a challenge.
How do we achieve those wonderful goals? .
For the next 31 days during the month of October, I will explore and write about ways that women can take better care of ourselves while trying to manage very busy lifestyles.
I will share resources, book reviews, alternative healing ideas, recipes, short cuts, etc.
I'm hoping you will join me each day as I share ideas, concerns, and some women's stories that may inspire and help you create more balance, well being ,and better health in your own life.
The topic I've chosen is " 31 days To Better Health. "
I hope you enjoy my 31 days To Better Health ! ( There will be 31 blogposts- not necessarily everyday.. but almost every day until I reach the 31...
I am participating in this 31 Day Challenge with well over a thousand other bloggers. If you are interested in seeing the topics of the other participants, visit the host at The Nester to see all the bloggers and their 31 Day Ideas.
How do you cope, manage your hectic schedule, find shortcuts, etc.? Please feel free to share any good tips or ideas in the comments..Love to hear your ideas; it helps everyone..
Tomorrow's Post
Day 2 : I am Woman, I am Invincible, I am tired! will be posted tomorrow Oct 2
May be Shared on some of the following blog carnivals: Blog Carnivals
Saturday, September 28, 2013
Hearty Red Lentil Vegetable Soup
Red lentil vegetable soup is a perfect fall or winter soup. Red lentils are hearty and have a different taste than the more familiar brown lentil.
Red lentils have the consistency of split peas but with a milder and sweeter taste. You will love the way the lentils just melt into the soup!
I've shared my delicious recipe for Egyptian red lentil soup in the past; today I'm sharing my friend Seraphine's red lentil soup. Her recipe is a little chunkier than mine with different seasonings and vegetables.
Have you cooked with red lentils before?
Satisfying, soothing, and filling are synonyms that describe this nutritious soup. The lentils are full of fiber, healthy proteins (17 grams per cup), low on the glycemic index, and have lots of antioxidants.
No Need to Pre- Soak Red Lentils
Red lentils cook quickly, so there is no need to pre-soak.
Shared on Souper Sunday
Pin It Please leave a comment so I know you stopped by. Scroll down to the end of the post and click on comments.
I've shared my delicious recipe for Egyptian red lentil soup in the past; today I'm sharing my friend Seraphine's red lentil soup. Her recipe is a little chunkier than mine with different seasonings and vegetables.
Have you cooked with red lentils before?
Satisfying, soothing, and filling are synonyms that describe this nutritious soup. The lentils are full of fiber, healthy proteins (17 grams per cup), low on the glycemic index, and have lots of antioxidants.
No Need to Pre- Soak Red Lentils
Red lentils cook quickly, so there is no need to pre-soak.
Red lentils look orange but transform to a golden color while cooking.
These colorful orange lentils fit perfectly into the fall color theme, providing a nutritious soup for a chilly fall evening. Eat it with salad and a sandwich for a nutritious quick meal.
Where can you buy red lentils?
They are everywhere but especially in any ethnic (Indian, Middle Eastern) store, health food store, Trader Joe's, and in the "Goya foods" section of most supermarkets.
These little lentils are naturally vegan, gluten free, hearty and tasty!! This satisfying soup is a winner!
To my friend Seraphine - I enjoyed eating this soup at your home and appreciate that you shared your recipe with me.
Seraphine's Red Lentil Soup Recipe
Ingredients:
16 oz. bag of red lentils, washed well
2 large carrots, diced
1 onion, diced small
2 stalks celery, diced small
1 bunch fresh parsley, chopped fine
Himalayan salt and pepper to taste
6 cups water (or 3 cups water and 3 cups vegetable broth)
Directions: Place washed and drained lentils into an 4 quart soup pot. Add the carrots, onion, celery, parsley and liquid. Bring to a boil and then reduce to a simmer. Cover the pot and cook for about 30-40 minutes until lentils are tender, stirring frequently to avoid lentils sticking. If you serve this soup the next day, you may need to add more vegetable broth as the lentils absorb liquid.
My Instant Pot version is now in my new soup cookbook soup
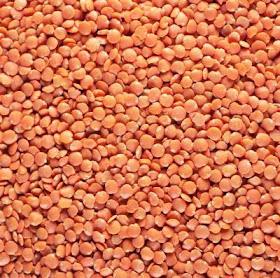 |
| uncooked red lentils: a rich orange color |
Where can you buy red lentils?
They are everywhere but especially in any ethnic (Indian, Middle Eastern) store, health food store, Trader Joe's, and in the "Goya foods" section of most supermarkets.
These little lentils are naturally vegan, gluten free, hearty and tasty!! This satisfying soup is a winner!
To my friend Seraphine - I enjoyed eating this soup at your home and appreciate that you shared your recipe with me.
Seraphine's Red Lentil Soup Recipe
Ingredients:
16 oz. bag of red lentils, washed well
2 large carrots, diced
1 onion, diced small
2 stalks celery, diced small
1 bunch fresh parsley, chopped fine
Himalayan salt and pepper to taste
6 cups water (or 3 cups water and 3 cups vegetable broth)
Directions: Place washed and drained lentils into an 4 quart soup pot. Add the carrots, onion, celery, parsley and liquid. Bring to a boil and then reduce to a simmer. Cover the pot and cook for about 30-40 minutes until lentils are tender, stirring frequently to avoid lentils sticking. If you serve this soup the next day, you may need to add more vegetable broth as the lentils absorb liquid.
My Instant Pot version is now in my new soup cookbook soup
Shared on Souper Sunday
My Notes:
1. I have made this soup in the Instant Pot too
2. This is a wonderful soup for Thanksgiving. If you don't want to add soup to your Thanksgiving dinner, consider it for the next day with leftovers.
3. In my adapted version, I add 2 bayleaves to my soup when cooking, and then remove them before eating.
Pin It Please leave a comment so I know you stopped by. Scroll down to the end of the post and click on comments.
Thursday, September 26, 2013
Thanksgiving Fruit Stuffed Acorn Squash - Gluten Free and Vegan
Want to dress up a simple acorn squash with a berry dressing? This fruit and nut compote is absolutely fabulous and is made from frozen fruit! This makes a beautiful Thanksgiving treat for a vegan, vegetarian or someone gluten free. The squash, fruit, nuts, and chia seeds make it a hearty healthy side.
Acorn squash sometime tends to be on the bland side. I had some of my easy to make peach and berry compote left over and realized it would be a perfect pairing for my seasonal squash turning it from good to great!
This stuffed acorn squash was delicious. I loved the berry and walnut flavors as they mingled with the squash.
Fall is starting to blossom all around us and the fall crops are abundant at the local farms.
 |
| The local farms are overflowing with winter squashes, bright orange pumpkins, and all kinds of interesting looking gourds. |
This is the peach and frozen berry compote that I had baked the other day.
Easy Way to Cook the Squash
Wanting to cook the squash quickly, I decided to steam it in a little steaming basket.
 |
| Place the steaming basket in a large deep pot with a lid ( like a spaghetti pot) |
I cut the acorn squash in two, removed the seeds. I then placed the two halves in the steamer basket ( it wasn't balanced but doesn't matter), placed the basket and squash in a large pot with a lid, added some water, ( enough to cover just up to the bottom of the steamer, turned on the flame, covered the pot, and let the squash steam on medium high for about 15 minutes.( you might need to add water as it evaporates to keep it from burning )
When the squash was ready ( it became soft, but not too soft), I removed it from the pot. I let it cool for about 15 minutes and then added the compote. I added a few chopped walnuts to the mixture for a little crunch. We ( hubby and I) really enjoyed the sweetness of the compote in the bland squash.
This squash makes an elegant side dish. It is one of my favorites to serve when we have guests!
Author: Judee Algazi @ Gluten Free A-Z Blog
Prep Time: 5 for the squash
Cook Time: 20 minutes for the squash
Prep Time for the compote: 5 minutes
Cook Time: for the compote 10 minutes
Total Time: 40 minutes
Serves: 4 Squash halves
Ingredients:
2 large acorn squash, cut in half, steamed, and seeds removed.
Filling for squash
..Ingredients:
4 peaches, washed , peeled , and sliced ( you could use frozen)
1 Tablespoon of vanilla
1/2 Tablespoon of cinnamon if desired
1 Tablespoon of arrowroot powder
optional: 1 Tablespoon of pure maple syrup
10 walnuts, chopped
Directions for the steaming the squash:
Cut the squash in half, scoop out the seeds, and pierce the green skin with a fork . Place steaming basket in a pot and fill with water to the bottom of the steamer. Cover and steam until the squash is soft. Remove and cool.
Directions for the filling:
Mix all the ingredients together except the walnuts. Put into a medium saucepan and cook over a low heat for 10 minutes. Stirring frequently.. Allow to cool , add in walnuts and mix, and spoon into the cavity of 3-4 steamed acorn squash halves.
1. Amazon, Home Goods, Bed Bath and Beyond sells these little steaming baskets. They are great because you can steam anything and everything in them in much less time than it takes to bake. I make spaghetti squash, broccoli, yams, cauliflower, beets, etc. in the little basket. It works so great and you don't lose nutrients by boiling away the vegetables.
2. This recipe is versatile.
Thanksgiving;If you would like to make it for Thanksgiving, be sure to add fresh cranberries to your compote.
Passover: Everything in this recipe meets kosher for Passover standards ( the chia seeds are questionable and may be left out and substitute potato starch or leave it out. It will still be great!
Rosh Hashanah: ( The Jewish New Year) Use apples in your compote !
3. You do not have to steam your squash. You can bake or roast your squash too.
4. Make the squash and the compote in advance. Just assemble before serving. I like it cold, if you do not then just warm up your squash and compote before serving. If you like it at room temperature or cold, then this will be a great time saver to free up your time and oven the day you serve.
If you like this post, please pin it on Pinterest
If you are new to my blog and would like me to email you my recipes when I post them, please enter your email on my subscribe box in the right top column of the blog. Don't miss a recipe - about one or two a week. ( you can unsubscribe at any time)
3K+
Please leave a comment so I know you stopped by. I love comments and love to be introduced to your blog. I usually visit and follow your blog on G+ , Bloglovin, and Twitter. Thanks for stopping by. To Comment: Scroll down to the end of the post and click on comments
Disclaimer: I am an affiliate for Amazon and receive a very small compensation when you buy anything from Amazon by clicking on to Amazon from my blog - This helps me defray the cost of my blog expenses. Thank you for your support.
Disclaimer: I am an affiliate for Amazon and receive a very small compensation when you buy anything from Amazon by clicking on to Amazon from my blog - This helps me defray the cost of my blog expenses. Thank you for your support.
3K+
Please leave a comment so I know you stopped by. Scroll down to the end of the post and click on comments.Peach and Berry Fruit Compote
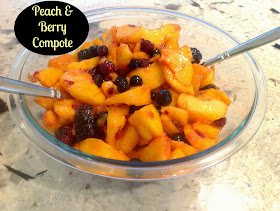 |
| This picture is before cooking |
My mom used to make fruity compotes in the 1950's for a light dessert, but who makes compote anymore? Yet, it happens to be a simple and absolutely delicious (gluten free, dairy-free, vegan) dessert that can be made with almost any fruit and shouldn't be forgotten.
By the way, compote is the French word for "mixture,"
5 Reasons To Make Fruit Compotes
1. Quick and EASY - can be made in 15 minutes
2. Healthy dessert or topping for pancakes, waffles, or muffins ( GF of course) or ice cream
3. Tastes Amazing- you can vary the fruit to the season or your personal preference
4. Practical way to use up ripe fruit- too much fruit? make a compote
5. Naturally Gluten Free and Vegan
Which Fruits Did I Use?
I made my compote with fresh summer peaches and a frozen berry mixture of raspberries, blueberries, sweet red cherries, and blackberries ( the mixture is from Trader Joe's and is my favorite- love the large sweet cherries).
I simply cut up the fresh peaches, combined them with the frozen berries from the Trader Joe package, cinnamon and vanilla and cooked the mixture on the stove top in a pot for about 10 minutes. OMG- what a flavorful treat with no added sweeteners!
Optional Extra Crunch:
I added some chopped walnuts at the end.
Want a thicker sauce?
A tablespoon of arrowroot powder (or organic cornstarch) or chia seeds will thickens up the mixture. But that is optional. It is fabulous without the thickener.
Eat with ice cream, over gluten free cake, plain, or with cooked winter squash.
Author: Judee Algazi @Gluten Free A-Z Blog
Prep: 5-10 minutes
Cook Time: 10 minutes
Serves: 4-6
Ingredients:
4 peaches, washed , peeled, and sliced ( you could use frozen)
1/2 bag of frozen berry mixture.
1 tablespoon of vanilla
1/2 tablespoon of cinnamon
optional: 1 Tablespoon of chia seeds- if you want the mixture to thicken and add some extra nutrients
optional: 1 Tablespoon of pure maple syrup if your fruit is not sweet enough
10 walnuts, chopped ( added at the end or when serving)
Directions:
Mix all the ingredients together except the walnuts. Put into a medium saucepan and cook over a low heat for 10 minutes. Stirring frequently. Allow to cool. Add in walnuts and mix.
Please leave a comment so I can be introduced to your blog . I will visit you and I usually follow on G+, Twitter, and Pinterest. I would love if you followed me as well Follow me as well : Gluten Free A-Z and Twitter .
Eat with ice cream, over gluten free cake, plain, or with cooked winter squash.
Author: Judee Algazi @Gluten Free A-Z Blog
Prep: 5-10 minutes
Cook Time: 10 minutes
Serves: 4-6
Ingredients:
4 peaches, washed , peeled, and sliced ( you could use frozen)
1 tablespoon of vanilla
1/2 tablespoon of cinnamon
optional: 1 Tablespoon of chia seeds- if you want the mixture to thicken and add some extra nutrients
optional: 1 Tablespoon of pure maple syrup if your fruit is not sweet enough
10 walnuts, chopped ( added at the end or when serving)
Directions:
Mix all the ingredients together except the walnuts. Put into a medium saucepan and cook over a low heat for 10 minutes. Stirring frequently. Allow to cool. Add in walnuts and mix.
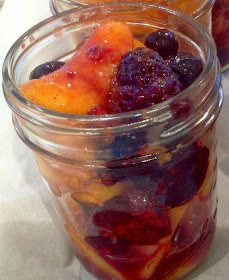 |
| compote My notes: Thanksgiving Idea: Spoon this heavenly mixture into the cavity of 3-4 already baked acorn squash halves. Acorn squash tends to be bland and not sweet. Baking the acorn squash halves and then filling with compote makes a beautiful side dish of vegetable, fruit, nuts, and chia seeds. I would add some fresh cranberries to the fruit mixture. Perfect for any vegan, vegetarian, or gluten free guests! Passover Idea: Passover is a holiday that we traditionally refrain from leavened products, yet the Passover baked goods can be challenging and unhealthy. What could be more "Kosher for Passover" than a simple fruit compote with nuts and spices. Use frozen fruit for variety and convenience. Rosh Hashanah Idea: Make a fruit compote using apples and pears for the Jewish New Year! _____________________________________________________ Please consider purchasing my cookbook on Amazon! plant-based soups cookbook (affiliate link) My Soups Cookbook contains over 80 healthy soup recipes and 80 inspirational quotes and time saving cooking tips to help encourage, guide, and inspire readers to reach a greater level of wellness. Plant-based soups cookbook (affiliate link) on Amazon with a "look inside" option to see all the recipe titles and introduction. Keep this cute paper back cookbook in mind for a stocking stuffer, house warming gift, or even birthday gifts! |
Please leave a comment so I can be introduced to your blog . I will visit you and I usually follow on G+, Twitter, and Pinterest. I would love if you followed me as well Follow me as well : Gluten Free A-Z and Twitter .
Friday, September 20, 2013
Great Way to Lose Weight
Whenever I feel like I need to lose some weight, I have to remind myself it's not just about giving up sweets and snack foods. It's about putting together a healthy eating plan that includes lots of fresh real foods like salads, vegetables, and high quality protein and complex carbohydrates that keeps you satisfied. Eating better not only helps me lose weight and look better, it helps me to feel more energized! Isn't that how you want to feel?
I have finally reached a stage in my life where I "get it", that dieting is not the answer!
I want a daily healthy meal plan that works for me every day. Something that is nutritious, satisfying, and easy. Have you heard of the Paleo diet?
Some of my followers may remember that one of my blogging friends Jedha from Good Food Eating facilitated an online weight loss boot camp about 2 months ago based on Paleo eating.. It was designed to not only support significant weight loss, but to offer a healthy eating regime that was designed to help you stabilize blood sugar, reduce cravings, feel great and boost your energy. In addition, it is a plan that you can live with the rest of your life...
Jedha reported that her participants did great! The Best You Bootcamp really worked because…No one was in it alone, and no one fell by the wayside.
Well, Jedha just informed me that she is about to do it again! She will have a new online interactive boot camp starting October 1st .
How much weight do you want to lose? Do you want to get rid of cravings and stabilize your blood sugar?
If you have been struggling with your weight and finally want to do something about it, this method may be for you. It's quick, it's supportive and it's healthy! If you are looking for a nutritional program that works, then this program could be of great help to you.
Jedha's promise:
"We can work together to change the way you eat and change the way you think, so you can go the full way this time, and stay at your ideal weight/health for good."
OMG!!. that makes so much sense to me! In addition to Jedha's programs being nutritionally sound, I also like that they are very affordable and reasonable.
Have you been wanting to lose weight since the beginning of the year but still struggled month after month? Do you feel uncomfortable every morning when you get dressed?
Well, it’s time to do something about it!
If you begin on Oct 1st, you will be feeling and looking so much better by Thanksgiving. You really need to check out the program
I know that I can't do it alone. I know I need something that gets me out of the rut...
If this is one of those times for you and you would like to know that in 6 weeks you will be looking and feeling better, then sign up right now.
I am an affiliate for this program and I will receive a small compensation for sharing it with my readers. But I would never share anything that I did not believe in.
Jedha is reputable, a certified nutritionist, an experienced weight loss coach.
Her time and program are valuable. I think it's a great opportunity.
You don't have to leave your house; her material is available online 24/7- whenever you need it. In addition, you'll be able to join in weekly live webinars for the personal connection that we all need.
In just 6 weeks you can make some serious changes in the way you look and feel.
I feel that Jedha's program can offer absolutely everything you need.
If you would like additional information , check it out for yourself to get all the details
Shared on some of the following blog carnivals: blog carnivals
Pin It Please leave a comment so I know you stopped by. Scroll down to the end of the post and click on comments.
Thursday, September 19, 2013
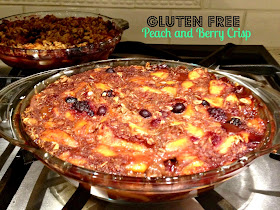
Vegan Peach & Berry Crisp ( Gluten Free)
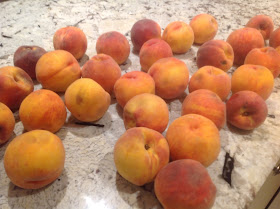
Yesterday, a local farm-stand was practically giving away fresh Jersey peaches.
I didn't realize it until I was about to check out and I heard the farmer say, " Can you believe nobody is buying these baskets of peaches that are just $2.00 a basket?" He caught my attention , so I took a look. There had to be about 40 decent and not too ripe large peaches in each basket. My mind started to fill with thoughts of peach crisps, peach smoothies, peaches and sweet potatoes, etc.Pin It
Well, two baskets, about 80 peaches and $4.00 later, I had to figure out what I was going to make.
I spent the afternoon peeling and slicing peaches. I made five peach and berry crisps, a peach and berry compote that I put in little mason jars, and I ate a lot of samples as I sliced. Despite everything, I had still had about 40 peaches left.
Since I don't know how to " can" , and I was running out of ideas, my husband took over. He just washed and sliced the remaining peaches and froze them .I'll use them for peach smoothies all fall and part of the winter... yum!!
The ingredients for the peach and berry crisps:
6 large peaches, peeled and sliced
1/4 cup of organic maple syrup
1/2 pkg of mixed berries ( I used my favorite Trader Joe frozen mix of cherries and berries)
3 Tabespoons arrowroot powder or 3 Tablespoons of corn starch ( non GMO)- Rumford Brand
Mix everything together in a large glass pyrex pie pan. The mixture will begin to make its own juice.
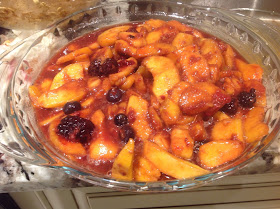
The Topping:
3/4 cup cooked quinoa
1/2 cup of uncooked gluten free oats
2 Tablespoons of olive oil
1/4 cup of low glycemic coconut crystals ( instead of sugar)
2 Tablespoons cinnamon
1 Tablespoon vanilla

Mix all ingredients together and then crumble over the fruit mixture.. Bake for about 30-40 minutes until fruit is bubbling and soft.
The crisp is gluten free, vegan, and sugar free..
May be shared on some of the following blog carnivals:
blog carnivals
Pin It Please leave a comment so I know you stopped by. Scroll down to the end of the post and click on comments.
Sunday, September 15, 2013
Black Bean Brownies ( SRC)

These Black bean brownies are one of the easiest and tastiest gluten free/ grain free desserts I have ever made. If you are a true chocolate lover, you will go Gag a over these brownies.
The batter is prepared in the blender, so they are ridiculously quick to make. In addition, they can be baked in parchment paper, so there is no pan to clean. Unfortunately, the day I made them, I did not have any parchment paper, so I had a cleanup.

Many gluten free recipes use beans instead of flour for cakes. I don't know why or how, but the black beans make the brownies moist and super super fabulous. They taste rich and fudgy despite being grain free.
This recipe is a no brainer.
It's easy ( I made it in the blender), healthy ( lots of fiber and protein) and delicious ( smooth, creamy, and fudgy). No one will ever know about the beans if you don't tell them. Shh! it's our secret...
Adapted the recipe from C Mom Cook,
Shelley's Ingredients with a few adaptions
1 1/2 cups cooked black beans (I used a 15 ounce can - measured out perfectly)
I used 1/4 cup olive oil or oil of your choice
3 eggs
1 teaspoon vanilla extract
1/2 cup unsweetened cocoa powder
1/2 cup light brown sugar ( I used coconut palm crystals)
1 teaspoon instant ground cinnamon
1/4 + 1/4 cup dark or semi-sweet chocolate chips
1/2 teaspoon baking powder
1/2 teaspoon salt
Shelley's Directions
Preheat the oven to 350 degrees F. Prepare a 9″ x 9″ (8″ x 8″ works too) baking pan by lining it with parchment paper. Leave enough parchment paper on the sides to create a sling. This will make it easier when you lift out the end product.
Add all of the wet ingredients – beans, oil, eggs, and vanilla – together in a bowl. Using an immersion blender, pulse the mixture a few times to get the ingredients to come together. Then blend fully until the mixture is smooth. ( I used the regular blender--)
Add the dry ingredients – cocoa, coconut palm crystals ( or sugar) , cinnamon and baking powder to the bowl. Again with the immersion blender, pulse a few times again and blend until the mixture is smooth.
Add half of the chocolate chips (this is where I used the mini chips). Pulse a few times again and blend until the mixture is smooth. The chocolate chips do not have to completely disintegrate.
Add the other half of the chocolate chips to the mixture. Fold in the chips with a spatula (do not blend). You want these chips to remain whole. Alternatively, reserve the chips to sprinkle on top before baking. Pour the batter into the prepared pan. If you chose to reserved the chips, sprinkle them on now. Bake for about 20-23 minutes, until the center is set - do not over bake.
Allow the brownie to cool in the pan for about 15 minutes. Lift the brownies from the pan using the parchment paper and transfer it to a cooling rack to cook completely. Cut them into squares and enjoy!
***To see the many other healthy gluten free recipes, healthy living tips, kitchen and blogging ideas that I pin or tweet each day, follow me on Pinterest Gluten Free A-Z and Twitter .
Please leave me a comment. It introduces me to your blog, and I usually visit your blog and follow on G+, Twitter, or subscribe. Thanks so much for visiting.
Will be shared on some of the following blog carnivals: Blog Carnivals

This recipe is a no brainer.
It's easy ( I made it in the blender), healthy ( lots of fiber and protein) and delicious ( smooth, creamy, and fudgy). No one will ever know about the beans if you don't tell them. Shh! it's our secret...
Adapted the recipe from C Mom Cook,
Shelley's Ingredients with a few adaptions
1 1/2 cups cooked black beans (I used a 15 ounce can - measured out perfectly)
I used 1/4 cup olive oil or oil of your choice
3 eggs
1 teaspoon vanilla extract
1/2 cup unsweetened cocoa powder
1 teaspoon instant ground cinnamon
1/4 + 1/4 cup dark or semi-sweet chocolate chips
1/2 teaspoon baking powder
1/2 teaspoon salt
Shelley's Directions
Preheat the oven to 350 degrees F. Prepare a 9″ x 9″ (8″ x 8″ works too) baking pan by lining it with parchment paper. Leave enough parchment paper on the sides to create a sling. This will make it easier when you lift out the end product.
Add all of the wet ingredients – beans, oil, eggs, and vanilla – together in a bowl. Using an immersion blender, pulse the mixture a few times to get the ingredients to come together. Then blend fully until the mixture is smooth. ( I used the regular blender--)
Add the dry ingredients – cocoa, coconut palm crystals ( or sugar) , cinnamon and baking powder to the bowl. Again with the immersion blender, pulse a few times again and blend until the mixture is smooth.
Add half of the chocolate chips (this is where I used the mini chips). Pulse a few times again and blend until the mixture is smooth. The chocolate chips do not have to completely disintegrate.
Add the other half of the chocolate chips to the mixture. Fold in the chips with a spatula (do not blend). You want these chips to remain whole. Alternatively, reserve the chips to sprinkle on top before baking. Pour the batter into the prepared pan. If you chose to reserved the chips, sprinkle them on now. Bake for about 20-23 minutes, until the center is set - do not over bake.
Allow the brownie to cool in the pan for about 15 minutes. Lift the brownies from the pan using the parchment paper and transfer it to a cooling rack to cook completely. Cut them into squares and enjoy!
***To see the many other healthy gluten free recipes, healthy living tips, kitchen and blogging ideas that I pin or tweet each day, follow me on Pinterest Gluten Free A-Z and Twitter .
Please leave me a comment. It introduces me to your blog, and I usually visit your blog and follow on G+, Twitter, or subscribe. Thanks so much for visiting.
Will be shared on some of the following blog carnivals: Blog Carnivals
Wednesday, September 11, 2013
How to Live to Be 100+
 |
| Fannie Krosnick |
My paternal grandmother lived to be a healthy 107 years old !
Born in Russia, came to US alone at age 16, and died in NJ at 107.
She died about 20 years ago.
That was amazing because statistics tell us that only about 1 out of 5, 000 people who live in America live to be 100! According to statistic, it seems that people are healthier and live longer in other parts of the world.
Life expectancy for woman in America is 80.. but are they healthy?
7 Day Adventists ( who are vegetarians, nature walkers, etc) -- live much much longer and are healthier
What improves those statistics? Well, there are lots of factors, but food, lifestyle, and community certainly play a part.
- Plant based diet is consistent for longevity- green plants
- Not overeating- stop eating when stomach is only 80% full
- Being active all your life- walking, working, socializing
- Family and community interaction is top on the list..Belonging is top on the list
- In America we have a work life and then we retire.. not so in countries where people have greater longevity!! People continue to have a purpose and live actively until they die
I found a Ted Talks on You tube that explains all about " How to live to Be 100+.
It was very inspiring.. Our food and lifestyle does affect longevity and health!
shared on these blog carnivals: blog carnival
Just Sharing ... Let me know what you think??
Pin It Please leave a comment so I know you stopped by. Scroll down to the end of the post and click on comments.
Sunday, September 8, 2013
Planning ahead! Lunch in a Jar
Are you wondering why I would pack my lunch in a glass Mason Jar? There are actually two reasons. One has to do with planning ahead and convenience and the other has to do with my weight loss plan !
Glass mason jars keep the food really fresh, and since I choose to plan ahead and pack 5 lunches on Sunday night, I really need each lunch to stay fresh for the week. The jars don't take up much room in the refrigerator, and I love being able to see all the layered ingredients at a glance. No matter how busy I get each day, my lunch is planned, it's healthy, and ITS READY whenever I am.
The second reason that I pack my lunch in a jar is because I measure out everything that goes into the jar, and then I count up the Weight Watchers points. I aim for a total count of 5 Points Plus for each jar ( maybe 6 tops) . This helps me to plan what and how much I am going to eat in advance. So when I get busy, hungry, stressed, or tired, I still get to eat a perfectly healthy weight conscious lunch.
I take the jar with me wherever I go, so I can stick to my weight loss plan.! If you are not on Weight Watchers or trying to lose weight, you may be having difficulty following my logic. But for the weight conscious and health conscious, this method really makes sense.
How many times do you find yourself grabbing the first thing that is available when you are hungry and tired. It might be crackers, a cookie, some chips, etc. That used to be me. I never feel like washing and making salad at 12:30.. Now I grab my lunch jar and eat healthy preprepared meal.
Here's my logic:( I make 5 jars in advance-what a time saver)
- I eat what's in my jar and only what's in my jar. ( therefore I don't overeat)
- The flavors mingle as they sit in the jar because I usually add a flavored vinegarette and it tastes delicious.
- I plan in advance when I'm not tired, hungry, and stressed; I always have a healthy meal ready for me
- You could do this for an after work snack
- You could do this for a quick dinner
- You could have a jar ready for your kids on a busy stressed night
- It makes me plan in advance..I make sure that I have the healthy food I choose to eat.
- Everything stays fresh, so I can make them in advance
- This saves me time!
- I wash all my greens and salad ingredients only once in the beginning of the week and distribute to the jars.
- It's easy to do ...
- The jars are appealing to look at
- I make a variety of salads using chick peas, black beans, or veggie burgers, quinoa, brown rice, cooked sweet potato, raw veggies or cooked veggies, jicama, fresh uncooked corn off the cob, etc. etc. I like to do one layer of each rather than mix them into a regular salad.
Here's my vegan salad in a jar lunch for today
- layer of dark green romaine, ripped into bite size
- layer of sliced cooked beets
- layer of quinoa ( 1/4 cup) ( 2 points plus)
- layer of veggie burger, cut up ( could use cooked beans) ( 2 points plus)
- layer of cucumbers
- layer of red cabbage
- Cherry tomatoes
- layer of shredded carrots
- orange champagne vinegar on top ( from Trader Joe's) ( 1 Point Plus.)
Will be shared on some of the following blog carnivals: Blog Carnivals
Pin It
Pin It Please leave a comment so I know you stopped by. Scroll down to the end of the post and click on comments.
Tuesday, September 3, 2013
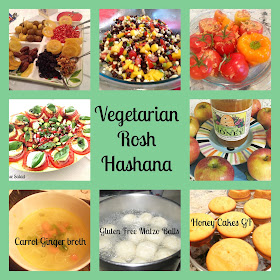
Vegetarian/Vegan Rosh Hashana
Can you prepare a traditional Rosh Hashanah meal if you are are gluten free, vegetarian or vegan?
The answer is Yes !
You can enjoy my vegetarian gluten free:
- Mock Chopped Liver
- No Chicken Broth
- Awesome Authentic Matzoh Balls
- Vegan entrees and sides
- Grain Free/ gluten Free Honey Cakes
- Grain Free/gluten free Mini Apple Cakes
- Grain Free/gluten free Challah
Before I get to the recipes, there are a few rituals that are customary to observe at the evening meals to celebrate the New Year.
1. A new fruit- To begin the New Year it is customary to eat a fruit that is new for the season. We say a prayer over the new fruit in gratitude for enjoying the fruits of the earth and for enjoying another year and season. Pomegranates, fresh figs, fresh dates, apples are fruits that are often chosen.
2. Honey- Honey is a traditional food that is featured during the holiday. It is customary to slice up apples and dip them in honey . Honey cake is another traditional dessert. We eat honey to welcome sweetness into the New Year.

3. Fish head- Ok we won't be eating a fish head in this vegetarian home, but the fish head represents the " head" and the Jewish New Year is the "head of the year" ...Rosh means head ... Hashanah means of the year. Maybe a head of cauliflower or a head of lettuce but NO FISH!
Here are the recipes:
Traditional Holiday Foods vegetarian- ized:
This is one of my favorites and everyone loves it: My mother always server chopped liver on Rosh Hashanah- this is my absolutely delicious vegetarian version made from walnuts and peas. This mock dish is delicious and fairly authentic looking and tasting. ( vegan)
Mock Chopped Liver ( Vegan and Gluten Free)
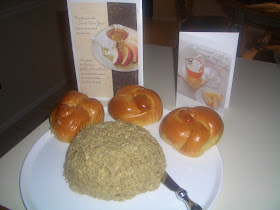 |
| closest vegan dish to chopped liver ( appetizer) |
- Vegetarian Borscht ( cold beet soup) for a hot day . Add a dollup of plain Greek Yogurt
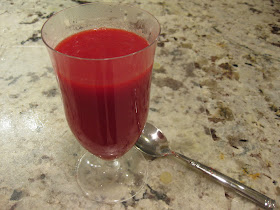 |
| I add Greek Yogurt to the beet soup and Love it! |
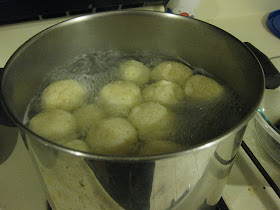
- We always had chicken broth on Rosh Hashana with Matzo balls- My Carrot Ginger Broth is really delicious and is great with thin rice noodles or my gluten free matzo balls
Just because you are gluten free doesn't mean you can enjoy a traditional delicious matzo ball. These gluten free matzo balls are so easy to make and taste very authentic.
- What would the Jewish New Year be without a good honey cake. This gluten free/grain free honey cake will blow you away.
- Gluten Free Mini Honey Cakes

Do you prefer gluten free Apple Cakes?
Try these wonderful mini apple cake muffins
This beautiful Gluten Free Challah can be made in an hour and anyone can bake it!
Here are some less traditional, but still appropriate for the holiday.
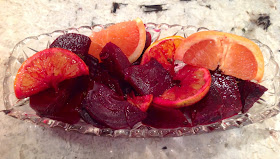
- Fresh Beets and Oranges
- Roasted Apples
- Artichoke and Tomato Salad
- Stuffed Portobella Mushrooms
- Chocolate Avocado Pudding
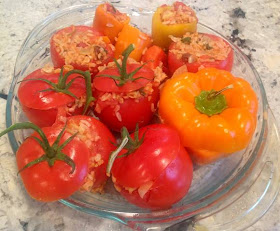
- Lemony Greek Stuffed Tomatoes
- Roasted Apples
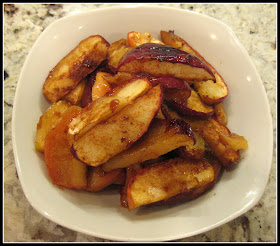 |
| Roasted Dessert Apples- Fragrant and Delicious |
- Healthy Chocolate Avocado Pudding ( Parve)
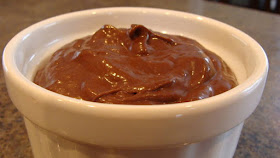 |
| Chocolate Avocado Pudding - Fast and fabulous and parve |

 |
| End the meal with fresh fruit |
Rosh Hashana ideas from other blogs:
 |
|
- Rosh Hashana Salad with figs, candied walnuts, and apple from from Busy in Brooklyn
This post will be shared on
If you are new to my blog and would like to be notified when I post a new recipe, please enter your email. Don't miss a recipe - about one or two a week. ( you can unsubscribe at any time) subscribe by going over to the right side column and look for subscribe by email.
I am an affiliate for Amazon and I do receive a small compensation if you purchase on Amazon through my blog. I appreciate the support to cover the expenses of running the blog.
 Food is my passion. I am gluten intolerant, busy. and strive for a healthy balanced lifestyle. It has taken me many years to come up with easy healthy recipes that meet gluten free, vegetarian and real food standards. On my blog I share my journey, my struggles, my discoveries, and my new recipes. I hope you find ideas, resources, and recipes that will be helpful to you. Come Back soon.
Author: Judee Algazi
3K+ Please leave a comment so I know you stopped by. Scroll down to the end of the post and click on comments
Pin It Please leave a comment so I know you stopped by. Scroll down to the end of the post and click on comments.


