Monday, May 30, 2011

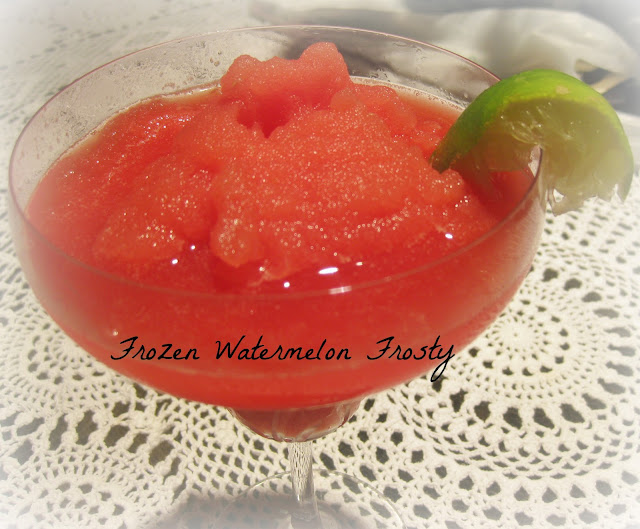
Frozen Watermelon Smoothies

Watermelon Smoothie on gluten free A-Z Blog


Looking for a refreshing icy cold fruit drink to serve at your next pot luck or bbq? This easy to make frozen watermelon smoothie will not disappoint and keep everyone cool as a cucumber in hot summer months!!

The key to the fabulous taste of this watermelon smoothie is that the watermelon is frozen before I make the smoothies!

How To Freeze Watermelon 
All I did is cut up some watermelon into cubes, popped them into baggies, then into the freezer overnight and in the morning the frozen watermelon was ready to be used to make these really cold refreshing smoothies.

Truthfully, it is refreshing just to eat some of the frozen watermelon cubes right from the freezer .
However, drinking frozen watermelon in a smoothie is truely amazing!


Let me tell you why I started making these smoothies!

It has been really hot and humid in Pennsylvania. Sometimes you just need something very cold and refreshing!

I was scrolling through Pinterest and saw lots of ideas for freezing watermelon and then using it for smoothies !

Do you know how good frozen watermelon smoothies  looked to me when I was dripping from the heat and humidity?  I wanted to make some right then and there, but I didn't have any frozen watermelon!  (who would?)


95 degree - hot and humid day ( I'm on the right of my cousin)

However, I did have a watermelon! 
Unfortunately , I had to wait until the next day when the cubes froze solid ( the next day).


Let's face it. Who would have ever thought to freeze watermelon? Not me! But I tried it!

I proceeded to cut up watermelon, placed the cubes in  baggies and froze them. Yes, it was that simple. (See freezing suggestions at the end of this post )

Today,  I am prepared for the heat.. It is still oppressively hot, but I have a few baggies of frozen watermelon in my freezer. 

Watermelon is Good For You

  • Watermelon has virtually no fat. A cup has only 48 calories and it is a rich source of valuable antioxidants and vitamins.
  • In addition, watermelon contains lycopene, an antioxidant that helps fight free radicals in the body that may lead to disease.
  • Watermelon contains more lycopene than any other fruit or vegetable including tomatoes.

**This rich source of lycopene may be especially good for those with prostate problems (ask your doctor first)

I usually buy a whole watermelon when they are on sale, and end up with more than we can eat in 2 days. There is no waste when you are able to freeze some for smoothies!

3 Ways to Use Frozen Watermelon Cubes :
  • Eat them plain right from the freezer - yum! It's like frozen ices
  • Use them as ice cubes in a pitcher of water to flavor the water and keep water cold
  • Mix the cubes into any type of smoothie
Watermelon Smoothie Recipe

Author of the blog: Judee Algazi
Prep Time: 5 minutes
Blender Time: 1 minute
Serves: 2-3 servings

Ingredients:

3 cups of frozen watermelon cubes
1 cup cold watermelon juice ( I save the watermelon juice when I scoop the watermelon)
Juice of 1/2 large lime
1 large ripe banana
Optional: sweetener of choice only if needed ( It should not be needed)

Blend all ingredients in Vitamix, Nutribullet, or in a strong blender.
Serve immediately with a wedge of lime.

My Notes: 
Suggestions:

1. Cut the watermelon in small chunks and freeze on a cookie sheet so it doesn't all stick together. Then throw it into baggies when frozen. ( about 8 hours) . Otherwise it may freeze in one large clump and that could be very hard on your blender. Melon balls are cute too.

2. When cutting the watermelon, reserve the watermelon juice in a jar and keep it in the refrigerator overnight. ( you can also just use water)

3. Don't skip the banana. The first time I made the smoothie, I skipped the banana and it just wasn't as good as with a banana. The banana really adds something to the drink.

4. This recipe is raw, vegan, dairy free, and gluten free.


Follow me on Twitter, Pinterest and G+ or even follow my blog. I post many more recipes  Gluten Free A-Z  and Twitter .

To leave a comment, scroll down to the green box at the end of this post and click on comments.
                                      
                                      This post will be shared on  

Pin It


Sunday, May 29, 2011

Hummus Bruschetta Appetizers


These simple hummus bruschetta appetizers are absolutely delicious, can be made in minutes, and are of course gluten free. I got the idea at a wedding that I recently attended. Who would have thought to combine two favorites on one piece of ( well they used toast); I used gluten free rice crackers. It's a mix of Middle Eastern and Italian.

To make the appetizer, simply use your favorite brand of store bought hummus (or make your own), your favorite brand of store bought bruschetta ( or make your own) and assemble on your rice cracker by first spreading the hummus and then topping it with the bruschetta mixture. If you want  to make your own bruschetta  just,chop  fresh tomatoes, garlic, cucumber, onion and basil very fine and mix with some olive oil, and a gluten free vinegar or lemon juice.  If you have gluten free bread , toast some and make your appetizer on rounds of toast.

Want an appetizer that is fast, but fabulous for a party ? This is it!


I love to read your comments
Please leave some by scrolling down to the green box at the end of this recipe and clicking on comments. 

This recipe has been linked to the following blog carnivals-
Mouth Watering MondayMy Meatless Monday,  King's Court What's Cooking Wednesday Heart and Soup Hop, Foodie Friday, Delectable Tuesday ,Fresh, Clean & Pure Friday , ,What's Cooking Thursday ,
 ,Your Recipe, My Kitchen, Just another Meatless Monday, Midnight Maniac Meatless Monday ,Motivate Me Mondays, Just Something I Whipped Up,  Recipe Roundtable, ,Totally Tasty Tuesday, Delicious Dishes, What's on the Menu Wednesdays,  Recipe of the Week, What's Cooking Wednesday, No Whine Wednesdays ,What's For Dinner?,
Friendly Wednesday ,Frugal Food Thursday, Full Plate Thursday, Recipe Swap Thursday, Simple Lives Thursday  Mommie Cooks, Foodie FridayFun With Food Friday, Fingerprints on the Fridge , Food Fight Friday ,Smile with Me Saturday, Potluck Sunday, Seasonal Sunday,.  Savory Sunday ,Sugar Free Sunday ,  Dr. Laura's Tasty Tuesday, Delicious Dishes, Tuesday's Tasty Tidbits, Tuesday Night Supper Club, Made From Scratch Tuesday, Traditional Tuesdays  This Chick Cooks, Pennywise Platter Thursday, Fresh and Pure Friday, Get Grillin Everyday Sisters Sharing Sundays

Tuesday, May 24, 2011

Quick and Easy Vegetarian Rice and Beans


This vegetarian, gluten free rice and bean meal may be quick and easy, but it is certainly not short on taste. We love this meal. I can usually throw it together in about thirty-five minutes from beginning to end including the cook time! This is a great recipe for when you are running short on time, but still want something healthy.


Sauteed in onion, garlic, cumin, cilantro, parsley and optional jalopeno, the black beans are exceptionally delicious ,and the Basmati rice adds an aromatic exotic flavor.


Just for the record, black beans are high in fiber, packed with  protective antioxidants, low in calories, low in fat, high in protein and minerals. And when it comes to the pocketbook, what could be more cost effective? An organic can of black beans is about a dollar, or if you cook your own, a bag of dried beans is a little over a dollar. You get a good amount of nutrition for your buck. Most of all black beans taste great!

 "Ounce for ounce, black beans have the same amount of protein as beef but contain no cholesterol, are packed with anti-oxidants, essential fatty oils, and fiber, and have only a third of the calories."( Stated in   Cooking With Trader Joe's by Dean Gunn and Wona Miniati )

Directions:
Cook 1 cup of Basmati rice according to directions ( or make 2 cups if you are big rice eaters) and set aside


Ingredients for beans.
Cooking oil Spray
1 Tablespoon olive oil
1 large onion, chopped
2 tomatoes, chopped or 1 small can tomatoes, diced
4 cloves garlic, chopped fine
8  cups of cooked beans ( about 4 1 pound cans, drained)
2 tsp of cumin
1/4 cup fresh cilantro, chopped fine
1/4 cup fresh parsely, chopped fine
Pepper to taste
Juice of 1/2 large lemon

Directions:

While rice is cooking, chop the garlic, onions, tomato, cilantro, and parsley to get ready to saute for beans.

In a large skillet, saute onion, garlic, and tomatoes in olive oil spray and additional olive oil until they begin to mingle well and become a little saucy. Add cooked beans, cilantro, parsley, cumin and lemon juice and cook together until the beans are hot. Serve immediately with the Basmati Rice. If you want even more flavor, you could make a bottle of Good Seasons Salad dressing ( use balsamic vinegar for the mix) and pour some of the salad dressing on the over the beans! yum!


If you are a black beans lover, check out another amazing recipe, Eggplant Chili with Black Beans! Yum!


Friday, May 20, 2011

Sun Dried Tomato Salsa

Gluten Free A-Z Blog - sun dried tomato salsa

Looking for a delicious appetizer?  Summer is the perfect time for chunky homemade salsa-

Sun dried tomatoes, fresh yellow or red tomatoes, and plump dark raisins give this flavorful salsa a  sweet, yet tangy flavor. This salsa is easy, exceptionally flavorful, and can be made with either fresh basil or cilantro.


I soak the sun dried tomatoes and raisins. After soaking, the tomatoes and raisins become more tender, plump, and digestible .

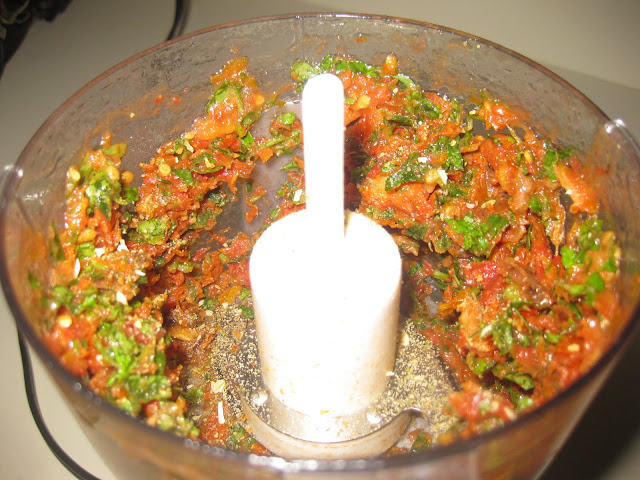
Once the sun dried tomatoes and raisins are soaked and drained for 2 hours, everything goes into the food processor and buzzed on and off until chunky.

This salsa  goes well with my frozen Kiwi Mojitos  or a nice glass of Spanish red wine and a basket of gluten free chips. It is low in fat and a good source of lycopene and other healthy antioxidants. In addition, it is vegan, gluten free, and raw- making it a perfect choice for most guests.


Judee Algazi @ Gluten Free A-Z Blog
Soak time: 2 hours
Prep Time: 10 minutes
Cook Time: None


Ingredients :
8 sun dried tomatoes , soaked about 2 hours and drain
1/4 cup organic raisins, soaked about 2 hours and drain
2 medium pretty yellow tomatoes ( or any fresh tomato), chopped , salted a little, and drained over a colander for 20 minutes ( This is important or it will be too watery)
1/2 cup fresh chopped cilantro ( or more if you love it)
3/4 cup fresh basil if you prefer it instead of the fresh cilantro
a few shakes of red pepper flakes ( optional)
1 Tablespoon olive oil

Directions: 
Soak sun dried tomatoes and raisins for 2 hours in water in  a medium size bowl.  Once soaked and drained, this recipe is so fast and easy. Soaking is no work at all and the sun dried tomatoes and raisins become beautifully plump, tender ,and more digestible.

Soak raisins and sun dried tomatoes separately for about 2 hours ( or less if in a hurry)


Put drained sun dried tomatoes, drained raisins and fresh cilantro into a mini food processor. Pulse a few times until chopped well.
                           spinach

Add fresh yellow tomatoes, ( or red) lime juice and red pepper flakes and pulse to salsa consistency. Season with salt and pepper if desired. ( I didn't add salt and it was delicious without seasoning)/

Chopped yellow tomatoes


food processor with salsa--


             I also use this sun dried tomato salsa as a topping for my mini stuffed peppers appetiser

Shared on Beth Fish Reads Weekend Cooking where anyone can share a food related post

Tuesday, May 17, 2011

Stuffed Pepper Appetiser


This is a raw stuffed pepper appetizer. It's like eating your crudite and dip in one bite. 
If you are trying to eat the recommended 5-9 fruits or vegetables a day for a healthy supply of antioxidants, this recipe will give you a full day's supply! 

The filling contains celery, carrots, fresh parsley, fresh lemon juice, fresh cilantro, raw walnuts, raw cashews, blended and then stuffed into a mini red pepper. And then its topped with a fresh salsa made from sun dried tomatoes, sweet yellow tomatoes, soaked raisins, and fresh basil. Talk about antioxidants!

It is a healthy recipe made from all raw foods. It is delightfully seasoned and very satisfying. It is so healthy, its hard to believe how tasty it is.
The mini peppers are totally sweet and are available in a bag, with a combination of red, orange, and yellow peppers. They are colorful, cute, sweet and appealing. In addition, if you don't use all the filling to stuff the peppers ( it makes a lot) , the filling is a great dip on its own to eat with crudites or corn chips!

When I finished stuffing the peppers for this post, I put some of the filling in a bowl with some chips for my husband, and he just about licked the bowl clean.

*** I purchased the walnuts and cashews at Trader Joe's which tends to be a little more reasonable.

I got a bag of these sweet mini peppers at BJ's; However, Trader Joe's and most supermarkets have them too.

Aren't they cute?
                                     Wash, cut off tops and slice in half lenghtwise.


Ingredients for filling
1/2 cup raw walnuts, soaked at least 4 hours and drained well
1/2 cup raw cashews, soaked at least 4 hours and drained well
1/ 4 cup fresh parsley
1/4 cup fresh cilantro
1/4 cup nutritional yeast
1 med carrot, chopped
2 stalks celery, chopped
1 red pepper, chopped
Juice of 1 large lemon
1/2 cup water
Seasoning: I used four good shakes of Trader Joe's 21 Salute ( a no salt spice mix)
otherwise: garlic powder, onion powder, or onion flakes, pepper, salt, cayenne, or any spice you like.


Place all of the ingredients in a Vitamix or strong blender or food processor. Mix until well blended. Taste and add extra spices if desired.
Spoon filling into the cavities of each pepper half and set aside while you make the salsa

                   Assemble peppers . Fill each 1/2 mini pepper with the nut and vegetable filling,

 
           Top each pepper with a spoon of my fresh  sundried tomato salsa recipe Serve as appetizer.

                   Eat immediately or refrigerate for about 2 hours. I think it tastes best the next day!


Monday, May 16, 2011

Spinach Vegetable Soup


This recipe calls for baby spinach, which gives the soup a unique flavor and it's darker hue. It's full of healthy vegetables, has an incredible flavor, and is relatively easy to make. I got the recipe from my friend Paula who is a wonderful and versatile cook. She cooks for her daughter who is a vegetarian and her son and husband who are both gluten free. I've had some absolutely fabulous meals at her home. One of my favorites is this Wilted Spinach Vegetable Soup.
Prep and cook time combined:  35 minutes

Ingredients:
2 medium tomatoes, chopped
3 cloves garlic, diced
2 med onions, diced
1 pound carrots, sliced
1 whole celery, diced
4 cloves of garlic , diced
1 med-large yellow squash
1 med- large green squash
1 pkg mushrooms, sliced
1/4 cup olive oil for sauteing
1 bag fresh baby spinach, washed
10 cups of vegetable broth

Saute tomatoes, onions and first 3 cloves of garlic in a T of olive oil in a large skillet on a low flame until the three ingredients mingle nicely and onions are a little soft. Add all the chopped vegetables except for the spinach and slowly saute in olive oil  until tender. Add the vegetable broth to the vegetables bring to a boil, turn down the heat to a simmer. Simmer until all the vegetables are soft. Turn off heat , add spinach, cover and allow to sit for at least 15 minutes before serving. Taste and add additional salt, pepper or spices if desired ( it will depend on the broth that you used)

Pictorial Step by Step
I have to apologize a few of the pictures are dark and didn't come out as well as I would have liked.


I love your comments; Please leave one
To leave a comment, scroll down to the green box and click on comment
This recipe has been posted on the following blog carnivals:

Melt in Your Mouth Monday, Just another meatless MondayMonday Mania, , Vegan MondayMy Sweet and Savory ,Mangia Monday, Slightly Indulgent Tuesday, Tempt my Tummy Tuesday,  Grain Free Tuesday,  Tuesday At The Table,  Dr. Laura's Tasty Tuesday, Made From Scratch Tuesday, Recipes I can't wait to try. Gluten Free Wednesday,  Welcome Wednesday, Real Food Wednesday,
Hearth and Soul Hop,  Potluck Sunday Your recipe, my kitchen,  Fight Back Friday, Cooking Thursdays, Seasonal Sunday, Cooking Wednesday,    Sugar Free SundayLisa's Gluten-Free Advice and Healthy Living, Thursday Ultimate Recipe  Garden Variety Wednesday, The Blog Entourage Full Plate Thursdays  Gold Star Wednesday,Food on Fridays”, La Bella Vita , Saturday Swap,
Homemaker Monday Midnight Maniac  ,Friday Potluck.Thursday Ultimate Recipe ,It's a Keeper Thursdays
Thrilling Thursday,

Friday, May 13, 2011

Quinoa Salad with Lemon Dressing

quinoa and tomatoes

This is an easy interesting salad. 
Make it as a side for your family dinner or for a take-a-long for  outdoor parties, picnic, or get togethers. 

If you are not familiar with quinoa, it is time to start using it. It is a highly nutritious type of  "seed " that is a rich source of protein, fiber, and nutrients. It cooks up like a grain, is gluten free, and tastes greatPronounced "keen-wah", it was originally grown in South America in the Andes Mountain area.  It was brought to the United States in the 1980's and cultivated in California. 

Tricolor quinoa from Trader Joe's
 
Quinoa can be purchased in any health food store, Trader Joe's, Whole Foods, or in the health food isle in most supermarkets. It may come in a bag like rice or a small box . It looks like little puffed sesame seeds. It has a mild taste and is good plain as a side dish, or made into a pilaf or tabbouleh..

My husband, king of the rice eaters, now loves quinoa, and I was surprised to hear my grown son Jason say, "yes", when I offered to make quinoa ( I was impressed that he has had it before).

This recipe for quinoa tabbouleh is adapted from a recipe I saw on the Whole Foods Website called " Gluten Free Tabbouleh". It has lots of raw cut up salad vegetables and a great dressing. This is my version. 

Ingredients:
3 cups cooked quinoa (1 cup dry, washed well)
1 cup parsley, chopped fine
1/4 -1/2 cup fresh mint, chopped fine ( optional)
3 green onions, finely chopped
2 cups small cherry tomatoes, quartered
4 crisp Kirby cucumbers, peeled and diced 
Juice of 1 large or 2 med lemons,
1/4 cup extra virgin olive oil
Sea salt and pepper to taste

Directions:
Cook quinoa according to package directions and set aside until cool. or make light fluffy quinoa in minutes in your Instant Pot ( link to recipe). 
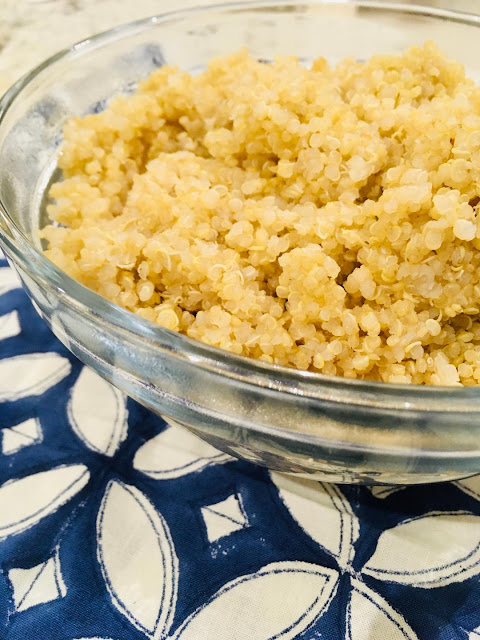
Bowl of white fluffy quinoa

Combine tomatoes, cucumber, green onion, parsley and mint together in a large pasta type bowl. In a large cup mix olive oil, lemon juice and seasoning. Add cooled quinoa to the cut up vegetables and add dressing. Taste and adjust seasoning with salt, pepper and lemon juice. Serve room temperature or chilled as a side dish.

Step by Step with Pictures


Chop all the vegetables


quinoa with lemon dressing
Mix cooled quinoa, chopped veggies and dressing
           I love your comments, so please leave one
           To leave a comment, scroll down to the green box below this post and click on comment

   Oil- Free Version: 
     In 2021 I became oil-free. That means I will just omit the oil from the dressing. I'm trying to work on a better solution. Will update when I do...
.

Saturday, May 7, 2011

Frozen Kiwi Mojito

frozen kiwi mojito


Having a BBQ or get together? Looking for something different. This Frozen Kiwi Mojito is light, refreshing for a hot day, minty and of course gluten free and vegan.  Mojitos go great with any appetizer and are usually a hit with any crowd. Without alcohol, even kids can enjoy them as a delicious fruity smoothie.

One of the key ingredients in any Mojito is fresh mint. 

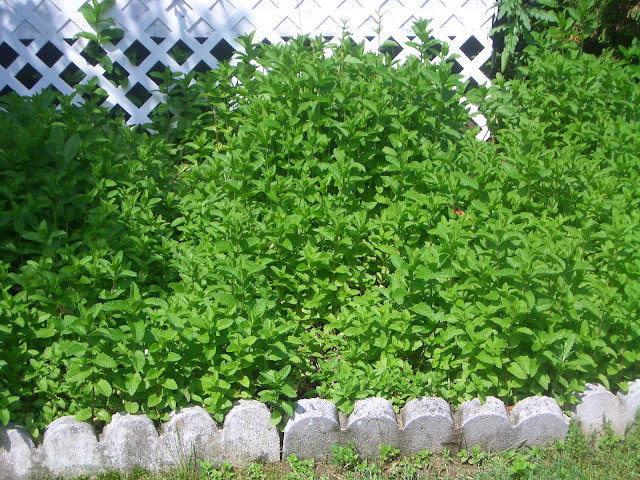
Here in Pennsylvania my mint garden  has been blooming since beginning of April.  However, If you don't grow your own mint, fresh mint is usually available in most supermarkets.

Fresh Mint is Good For You.

 Nutritionally, it has vitamin A, C, B12, thiamine, folic acid and riboflavin. In addition, it has minerals including iron and is packed powerful antioxidants and chlorophyll.

You Can Grow Your Own Mint Very Easily 

Mint is ridiculously easy to grow, and once you begin growing mint, you will have an abundant supply forever. It returns every season and spreads. It likes partial sun and humid weather and literally takes no care! 

Twenty years ago, I planted a single tiny one twig mint plant, and now every April - well,  look at my mint garden, you can see how it has spread and spread.  It is worth the small investment and there are so many recipes that call for fresh mint. If you know someone who grows mint, ask them for  a shoot or two to plant. If they are like me, they will have plenty to share. 

Or grow mint in a large pot on your  deck

fresh mint plants growing in the yard
Frozen Kiwi Mojitos are easy to make and are healthy.  Just get out that blender, add the ingredients, and whirl away. In minutes you can be enjoying a refreshing all natural fruit mojito .


bouquet of mint

How to Make the Frozen Kiwi Mojito 

Ingredients:

Juice of 2 fresh limes
1/2 cup maple syrup or any sweetener of your choice
optional: 4 ounces of plain white rum (or leave out the alcohol)
1/4-1/2  cup of fresh mint leaves
1 cup fresh kiwi, peeled and cut up
2 cups crushed ice or 1 cup of frozen kiwi and 1 cup crushed ice)

Directions:
Put all ingredients in the blender and whiz away until well blended.
Serve with a sprig of mint and a slice on kiwi on the rim of the glass.

***For a non-alcoholic drink, leave out the rum.
***Most plain rums are gluten free ; check the ingredients of flavored rums may not be gluten free, so you will have to double check

mojito


What else do I do with mint?


  • I use mint to make  hot or as iced mint tea. 
  • We add mint leaves to homemade lemonade,
  • I place a bunch in a vase to enjoy in my kitchen, and 
  • I use it as a garnish. 
  • I make a minted carrot salad, zucchini with lemon and mint, and 
  • omelets with dried mint which are actually sensational.
  •  I also add some sprigs of fresh mint to my juicer when I am making green juice 
  • If I am feeling ambitious, I will dry big batches to use in recipes throughout the winter.
  • Mint Ice Cubes are great for a party

How to make mint ice cubes
You simply place a sprig of fresh mint in each container of an ice cube tray. Fill with water and freeze. You have a pretty ice cube with fresh mint in the middle.

Another variation for making mint ice cubes is to place about 12 mint stalks in a deep pot or bowl and pour boiling water over and allow to steep until the water brews into a strong mint tea. Remove leaves, allow to cool and then fill the minted tea into an ice cube tray or two. Add a sprig of mint to each compartment if desired and freeze. Mint ice cubes are a nice addition to almost any drink especially lemonade, iced herbal tea or even to a glass of plain water.


How to dry mint:

You can wash and dry mint for future use in omelets, cooking, etc.
It is a simple procedure. Just wash the mint first, place on a rack and leave for about 4-5 days until the leaves turn dark, dry and brittle.( maybe less, depends on the humidity)
Remove the leaves from the stems, place the leaves into a food processor with the metal blade and pulse on and off until the dry leaves become very small. Store in a jar with a tight lid. Will last all winter. Can also keep refrigerated.


Takes about 4 days to dry; remove leaves from stems and crush or put into small processor
This post will  be shared on  

My blog carnival list

Want to be added to My blog list? Let me know


Do you like my recipes? If you are new to my blog and would like to be notified when I post a new recipe, please enter your email in the top right hand corner of my blog.  ( you can unsubscribe at any time) subscribe by going over to the right side column and look for subscribe by email.

Just so you know: I am an affiliate for Amazon and I do receive a very small compensation if you purchase on Amazon through my blog. I appreciate the support to help cover the expenses of running the blog.

I LOVE YOUR COMMENTS, SO PLEASE LEAVE ONE
To leave a comment, scroll down to the green section below this post and click on comments

Sunday, May 1, 2011

Chocolate Coconut Panna Cotta

Chocolate Coconut Panna Cotta is great recipe for those wanting a gluten free/ dairy free or vegan sensational dessert. It's light, silky,and creamy and  is made with coconut milk. It has a mild flavor that is enhanced by almost any kind of topping.

I used amaretto liquor and chocolate chips. It was so enticing, my husband took a bite before I could snap the picture.

Substituted Coconut Milk for Heavy Cream

Panna Cotta is a rich creamy Italian dessert that is traditionally made with a lot of heavy cream. The coconut milk in this recipe seems to give the dessert the same creamy texture.

You can purchase coconut milk in cans in the supermarket or at Trader Joe's for about half  the price. Coconut milk also comes in the refrigerator case in cartons in some supermarkets 

In addition, since I am a vegetarian, I also substituted a vegan product that I purchased in the health for store for the gelatin. The results were fabulous and its not too sweet.

Author: Judee Algazi
Prep Time: 15 minutes
Cook Time: 3 minutes
Chill Time: 4 hours to overnight
Serves: 6 ramekins

Ingredients
1/3 cup coconut milk
1 (.25 ounce) envelope of vegan gelatin substitute ( from health food store)
2 1/2 cups  coconut milk ( or regular heavy cream)
1/2  cup organic sugar
1 1/2 teaspoons real vanilla extract
3 T cocoa
1 t cinnamon
Amaretto liquor for topping ( optional)


Directions
1.Pour 1/3 cup coconut milk into a small bowl and stir in the gelatin powder. Set aside.
2. Pour 2 1/2 cups coconut milk and sugar into a small saucepan and bring to a boil while whisking continuously. Shut off the heat, and pour the gelatin and coconut milk mixture into the saucepan, stirring until completely dissolved. Put heat on low , cook for one minute, stirring constantly. Remove from heat, stir in the vanilla, cinnamon and cocoa and pour into six individual ramekins that have been sprayed with vegetable spray.
3.Allow to sit until they reach room temperature and then place in refrigerator for at least 4 hours or more. Can be left overnight.
This is a mild dessert so the toppings are what brings extra flavor.
Top with amaretto liquor, Kahlua, mini chocolate chips , chocolate syrup,  berries and syrup.. etc.

Scroll down for step by step pictures


Step by Step Pictures
Mix gelatin product with 1/3 cup coconut milk and set aside

Bring the other 2 and 1/2 cups coconut milk and sugar to a slow boil, whisking continuously

Pour gelatin mixture into the heated coconut milk and sugar mixture
 and cook additional minute stirring continuously,

Pour mixture into dessert dishes that have been sprayed with
vegetable oil spray  and chill for 4 hours or more
Turn upside down to unmold and top with
chocolate chips and amaretto liquor


Printfriendly